

HOW TO REMOVE A BACKGROUND IN PHOTOSHOP
Sometimes, you find the perfect image for your needs, but it’s part of another picture.
You don’t want to use the entire picture. A simple crop won’t suffice. You’d really love to extract just that image from the background.
Similarly, if you shop for a stock image at ShutterStock or iStockPhoto, sometimes you can purchase a whole set of similar objects in a single picture, instead of buying each one individually. When the images are packed tightly, sometimes a simple rectangular crop won’t work to extract just one image. What you need to know is how to remove one object from the background.
There are several ways that you might remove an image from its background (or remove the background from an image) using Adobe PhotoShop.
I will discuss two different ways to approach this, and discuss both simple and complex cases.
The process is easiest when the background consists of a single solid cover, but in practice, that’s often not the case.
It’s good to know a variety of methods, so you can use the simplest method when it works, but have back-up plans for when it doesn’t.
Just in case your version of Adobe PhotoShop may be a little different, you may want to know that I’m using Adobe PhotoShop CC (i.e. through the Creative Cloud).
QUICK SELECTION
When the quick selection tools work the way you’d like them to, they’re fantastic.
The idea is to quickly grab one object that you “see” in the picture, and then you can simply cut it (Edit > Cut), open a new file, and paste it in (Edit > Paste).
The problem is that PhotoShop doesn’t always “see” the same sets of objects that you see with your eye and interpret with your mind.
If the background is a solid color that contrasts well with the image, the quick selection tool often proves to be very convenient.
But if the background is complex or blends in part with the image you want to grab, you might discover that this tool doesn’t always grab things the way you’d like.
Fortunately, it’s easy to test this tool out and see if it will work easily for your task. If not, you can try something else.
Find the quick selection tools on the toolbar (which appears in a column on the left of my screen). For me, it’s the fourth icon down from the top.
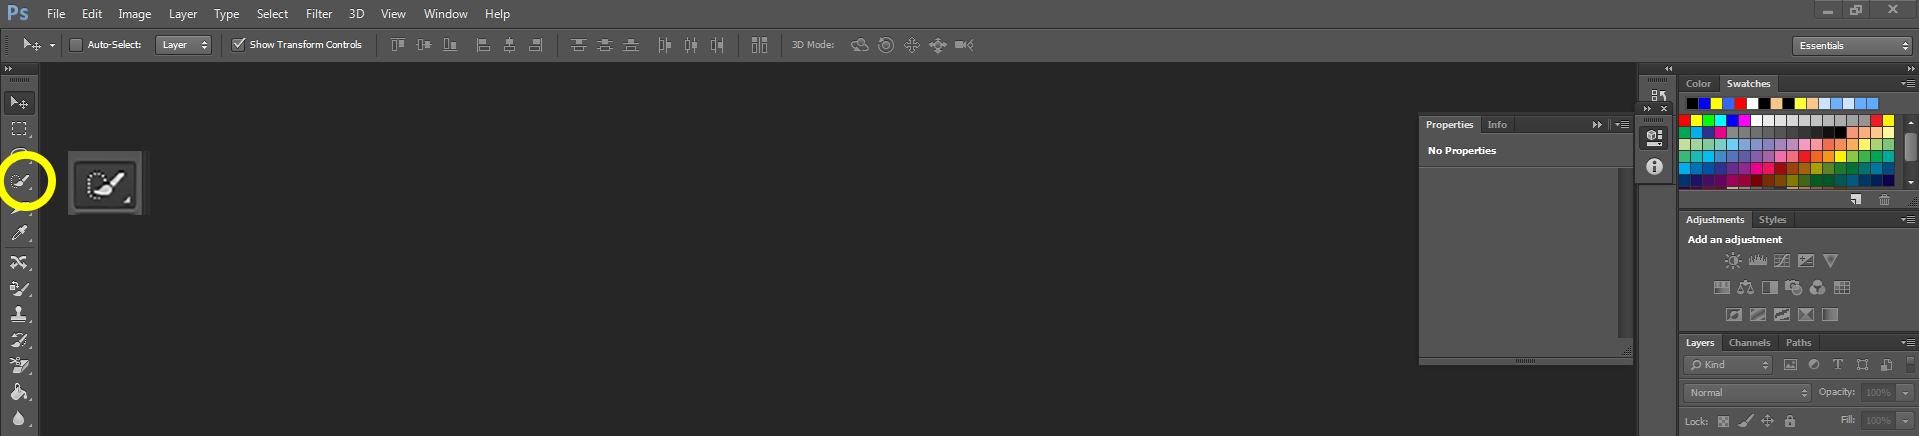
There are two tools in one: A quick selection tool and a magic wand tool. Click on whichever icon appears in the toolbar and hold it down for a moment (or just right-click the icon) to display both choices, then you can switch to the other tool.
I use the quick selection tool to try and grab the object. I sometimes find the magic wand tool helpful to grab one small part of an image (or several small pieces) that I couldn’t grab all together with the quick selection tool. Despite its name, the “magic wand” tool doesn’t simply read your mind and do whatever you hope for; but the “magic” comes in when it succeeds in grabbing a small, odd shape that’s otherwise hard to select.
When you choose the quick selection tool, another toolbar appears (in my case, it shows horizontally at the top of the screen). One of these icons has a number, and allows you to choose the brush picker. Click this icon and adjust the pixel size. I usually work with 100% roundness. If it’s not doing what you want, other things you can play with include hardness and spacing.
My first goal is to get the pixel size just right. When you hover over the image, you’ll see a circle appear with cross-hairs in the middle. As you vary the pixel size, the circle resizes accordingly. I first want as large a circle as I can make without any part of the circle extending into the background. Then I position the cross-hairs over the object with the complete circle within the object, and left-click once.
You’ll see a selection path appear on the screen. If this path happens to be exactly what you want, then ta-da, you can simply go to Edit > Cut to put your image onto the clipboard.
If the selection path extends into the background, then if you cut the object out, it will include part of the background along with it. If you want to avoid grabbing part of the background, too, then you want to be careful that the selection doesn’t extend into the background. (However, in complex cases, sometimes it pays to select the object along with a little of the background, put this image into a new canvas, and then work on removing that little bit of excess background.)
If the selection path includes less than what you want to select, you can increase the selection path by placing the cross-hairs at another position in the image and left-clicking again. You can resize the circle before making the second selection. You can click a third, fourth, fifth, etc. time, as needed, to try and build up exactly what you want.
But sometimes, PhotoShop just doesn’t see the object the way you that you do, and no matter how you try to select the object, the quick selection tool just doesn’t provide the convenient option you’re looking for.
Note that you can press Ctrl + Alt + Z to go a step backward, and press it repeatedly to undo several steps (but note that there is a limit to how far you can go back, so be careful not to go too far forward if you’re just experimenting).
In the example below, I used the quick selection tool to easily remove Jupiter from the solar system picture.
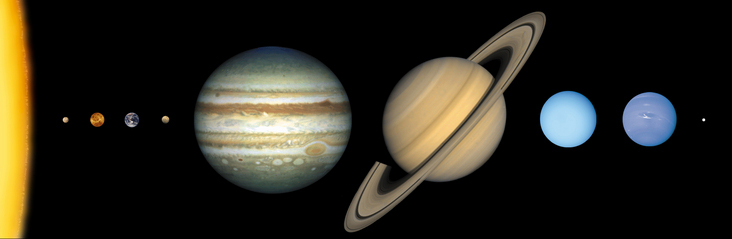

It wasn’t as easy to remove Saturn from this photo, however, as the dark shadows from and within the rings blend with the background. I used the quick selection three times: Once to grab the planet, and twice (with much smaller sized circles) to grab the two sides of the rings. Below it looks like it came out well because I pasted it onto a black background:

However, the following picture shows that this technique didn’t work perfectly. In this case, I could use the background eraser (with a fine scale) to wipe off the little background that came with the image.

BACKGROUND ERASER
If you’re not having luck trying to select an object with the quick selection tools, you may have better luck removing the background.
The eraser tools can help you do this. For me, the eraser tools are the 11th icon down the toolbar.
These include the eraser, background eraser, and magic eraser tools. Right-click the eraser icon to see the alternatives (or hold it down for a moment).
I usually begin with the background eraser.
The background eraser can be convenient when you have an image that is distinct from a simple background.
The erasers can also be useful (though not necessarily convenient) for complex images or backgrounds. Some cases are simpler than others. The more complex cases can involve some work and patience.
Let’s look at the simple case first.
In the image below, I first attempted to remove the earth with the quick selection tool (followed by a cut and paste).
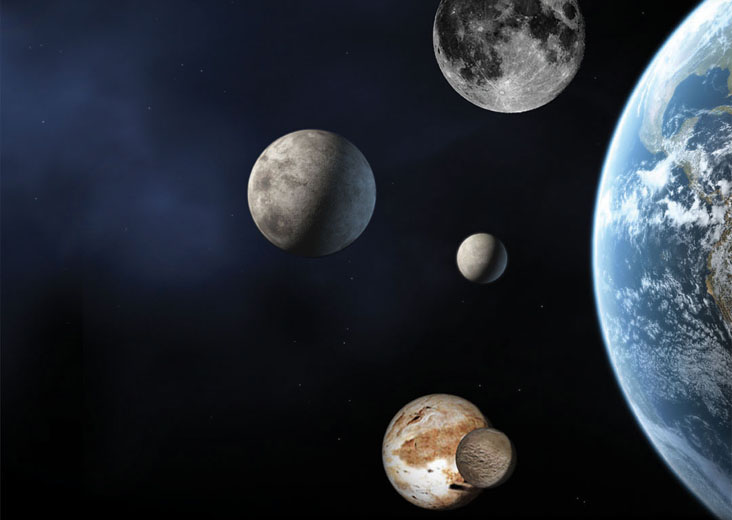
It looked pretty good at first, but when I pasted it into a new file, I noticed some imperfections. It’s not smooth. Look closely and you can see the inconsistency along the border.

So next I used the background eraser tool.
First, adjust the size of the background eraser. Look for the icon on the top toolbar (when the background eraser is already selected) that has a number in it. I like as large a circle that I can use that won’t create problems.
Don’t place the cross-hairs in the image that you’re trying to keep. Place the cross-hairs over the background. It’s okay for the circle to extend onto the object you’re trying to preserve in the foreground, provided that the color of the background is distinct enough from the colors in the foreground. When you have whites or grays in your image, and white on the background, for example, then the background eraser can remove the light colors from your foreground. In that case, you must be careful not to let the circle extend into those similar colors of the foreground.
It takes a little trial and error to get the size just right, and sometimes you need to use a large size for parts of the background, and a smaller size for other parts. You can eliminate a huge part of the background with an extremely large circle, but often need a smaller circle if precision removal is needed near the foreground object (but if the foreground and background colors are distinct enough from one another, you don’t need those smaller circles—precision isn’t called for).
I set the roundness to 100% for most jobs. Also play with the tolerance to get that right (is it removing too much? too little?).
I usually like to have Limits set to Find Edges, but on complex backgrounds, PhotoShop can find edges that you’d like to ignore. In that case, try adjusting the tolerance, or try contiguous or discontiguous.
Below, you can see how I used the background eraser to remove the background near the earth. (Note that with large circles it would be very easy to remove the rest. I left it like this so you can see how I got the process started.)
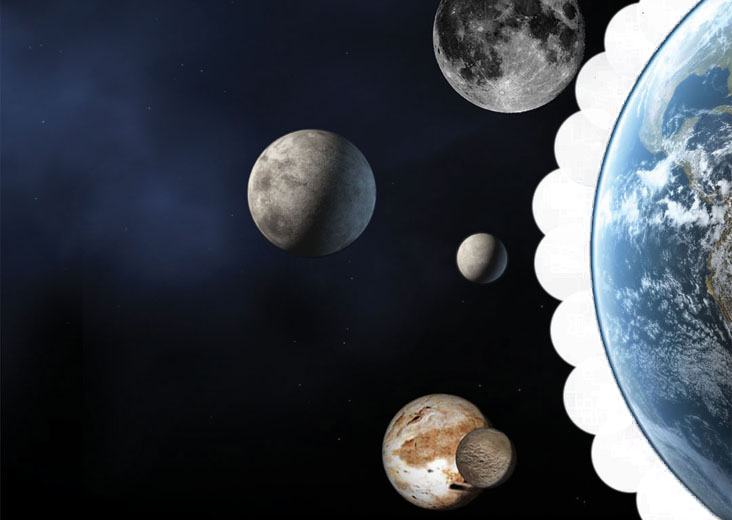
Compared to the quick selection tool, the outline of earth’s atmosphere is much smoother.
It helps to pay attention to detail when using the erasers. Sometimes, you wipe out a lot of background and wipe out just a little foreground along with it, and it’s not always easy to notice that little bit of foreground that disappeared. Watch closely.
The eraser tools don’t always work so easily. It depends on the complexity of the background and whether or not parts of the foreground and background can easily get confused by PhotoShop.
Sometimes, it’s a challenge to remove the part of the background adjacent to parts of the foreground. This often happens when there are similar colors in both.
In that case, I first trim away as much of the background as I can easily without interfering with the foreground.
Then I use the regular eraser (not the background eraser) to do some precision trimming. (Or sometimes, after removing much of the background, the quick selection tool works better than it had originally. It doesn’t hurt to try, as long as you don’t go more steps forward than you can undo.)
After selecting the regular eraser, on the horizontal toolbar at the top, a tiny drop-down arrow (at the left of this toolbar) lets you choose a chiseled or pencil eraser. The mode options include brush, pencil, or block. I find the block convenient for cutting out straight sections (and you can go to Edit > Transform to rotate the image so that the part you want to trim is perfectly horizontal or vertical). I don’t hold it down and drag the block; I cut out one block at a time (click, move, click, move, etc.), careful to line up each cut (and press undo if it’s slightly off). If it’s not straight, I may use something other than the block, and then I try dragging to erase. I do it in stages, unclicking to save one section when I’m happy with it. Precision erasing can get tedious, especially with complex boundaries.
Let me illustrate erasing with the following picture of dice that I took for my math blog.
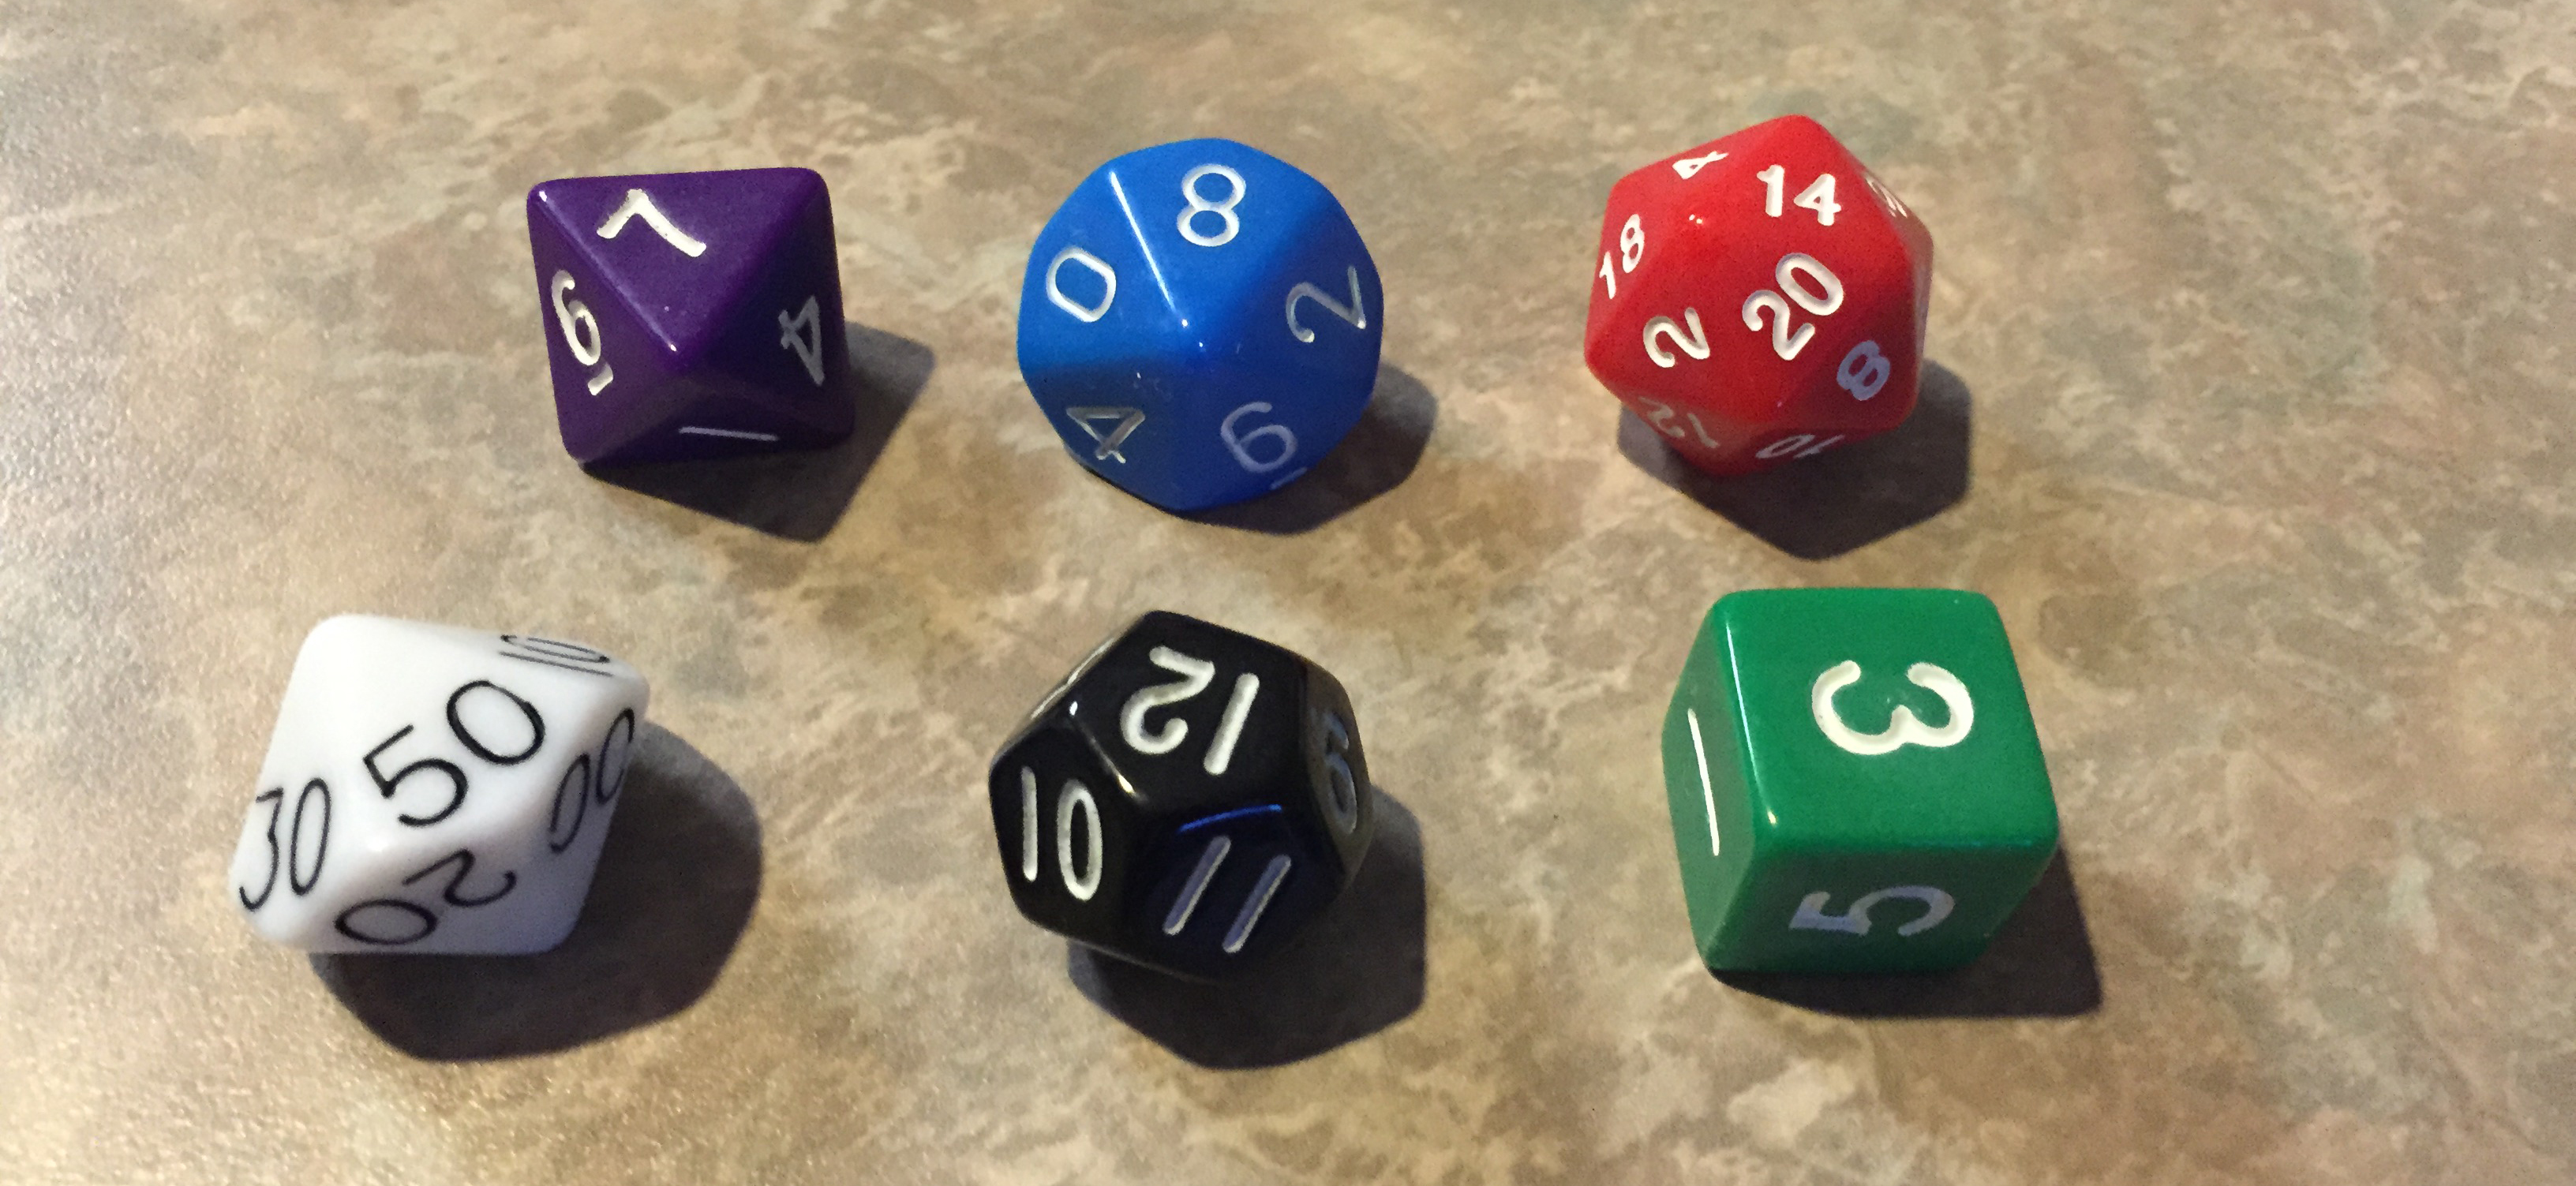
I first cut out the purple die with the quick selection tool, but that included the shadow along with it.

So then I wanted to remove the shadow. It proved not to be easy, as PhotoShop easily confused the dark purple of the die itself with the dark shadow.
I used Edit > Transform to free rotate the image until the bottom edge appeared horizontal (I later realized that the cut shown wasn’t quite parallel to that edge), and then I used the eraser tool in block mode to cut across.

I next made the right edge vertical to clip up the right side, and finally cut out the corner.
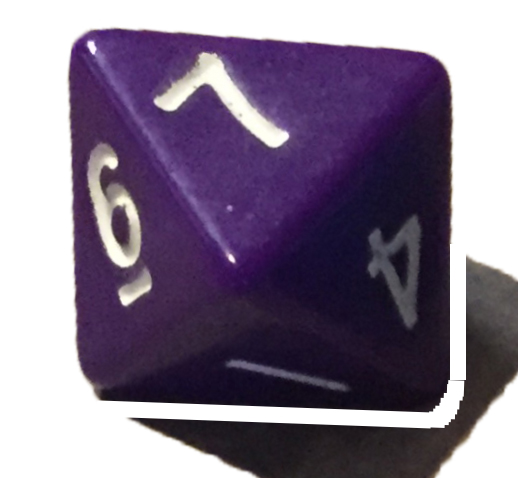
The cuts shown aren’t perfect. If I needed more precision, I could continue with precision erasing, or I could try to blur these edges to match the fuzziness of the others, etc.
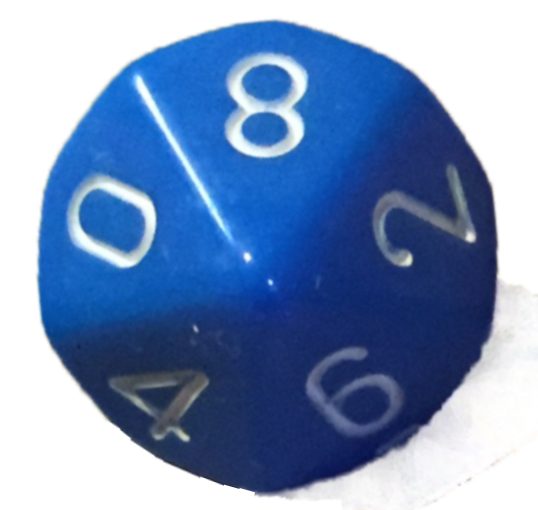
The blue die was easier to extract with the background eraser, as it was easier for PhotoShop to discriminate between the blue faces and dark shadow. If you look closely, though, you’ll see that it didn’t erase completely (but that light mess could be cleaned up with some more work).
ALTERNATIVES
PhotoShop is loaded with options, from masks to clipping paths to filters. There usually are several ways to do something, not just one or two ways.
Do you have another method of extracting an image from a picture that you prefer? Please share your idea in the comments. 🙂
Image credits
All of the images used in my examples are from NASA’s website (except, of course, for the dice photo that I took myself).
Chris McMullen
Copyright © 2015
Chris McMullen, Author of A Detailed Guide to Self-Publishing with Amazon and Other Online Booksellers
- Volume 1 on formatting and publishing
- Volume 2 on marketability and marketing
- 4-in-1 Boxed set includes both volumes and more
Follow me at WordPress, find my author page on Facebook, or connect with me through Twitter.
Comments
Click here to jump to the comments section:
