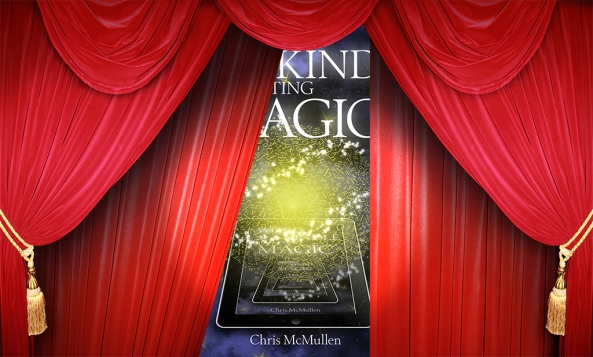
WORD TO KINDLE FORMATTING MAGIC
I will share some Kindle formatting tips and also introduce my newest book, Word to Kindle Formatting Magic, which is available in both paperback and Kindle editions.
- Kindle ASIN: B07BL5K6DH
- 522-page Paperback ISBN: 978194169122
KINDLE DESIGN
The beginning of Kindle design comes from understanding the semi-reflowable nature of eBooks. A typical eBook isn’t quite reflowable in the same way that a scrollable webpage displays (although the Look Inside feature displays that way), but it also doesn’t have a predictable fixed layout like a print book.
Since different customers will read the eBook on a variety of screen sizes and aspect ratios, from cell phones to HD tablets, and since the customer can adjust the type face, font size, background color, and internal margins, you can’t predict which information or how much information will show on any given screen.
The main idea is that a typical eBook doesn’t consist of well-defined pages like a print book does.
This impacts the design of Kindle eBooks in various ways. For example,
- You need to choose the size and aspect ratio of your pictures wisely so that they look fine on any size screen. You also need to make sure that they look fine on white, black, cream, or green reading backgrounds.
- A blank line could seem to vanish, since there is always a chance that it will show up at the very top or bottom of the screen.
- Tall figures may be forced onto the next screen and may leave a lot of white space on the previous screen.
- Subheadings may happen to fall at the bottom of a screen, unless you apply a page break to them, but a page break may waste a lot of white space on the prior screen.
- Page numbers don’t make any sense in your eBook. Anywhere your text says something like, “as shown on pages 23-28,” you need to rewrite it.
Another important element of Kindle design is to understand the limitations of what Kindle can and can’t do, especially on older devices, including the limitations of the online and downloadable previewers (for example, in displaying tables, pictures, and special symbols). Following are some examples.
- Use of the tab key to attempt to control paragraph indentations can be a disaster. The best way to control paragraph indentations is by applying clean paragraph styles (or style definitions) without direct paragraph formatting.
- Some devices may automatically indent paragraphs that you wish to be non-indented. You have to trick the device into not indenting justified or left-aligned paragraphs.
- Left alignment may automatically appear justified full unless you go a step beyond Microsoft Word.
- Kindle’s justification isn’t perfect, although it has improved tremendously with Amazon’s new Enhanced Typesetting. If you try to prevent a runt (or orphan)—a short word at the end of a paragraph appearing on the last line all by its lonesome—with a non-breaking space, if the string of text has more than about 6 characters, you could wind up with an undesirable automatic hyphen or a large gap at the end of the previous line.
- Bullet points come with a variety of limitations. The bullet symbol itself appears subdued. Negative indents, hanging indents, and multi-level indents pose problems, especially for older devices. Word’s automatic list tools automatically result in a large indent, and if you try to change Word’s indent size, the list looks worse in other ways. Even the simple ordered and unordered list tools with basic HTML have problems. To top this off, lists exaggerate the justification issues.
- If you know how to avoid widows and orphans in your print book, you need to exercise self-discipline to avoid trying to control them in your Kindle eBook, and accept the fact that occasionally there may be just a few words on the last page of a chapter all by themselves.
Related to this is a degree of quirkiness, meaning that some features (like tables or special symbols) display differently on first or second generation Kindle Fires and older Kindle eReaders than they do on the most recent generation of Kindle devices.
For example, suppose that you wish to incorporate a page break into the paragraph style for the first row of a basic table, in order to prevent the table from starting near the very bottom of a screen (which would otherwise sometimes happen depending on the screen size and customer settings). On first and second generation Kindle Fires, this may result in ghosting, where you see the outline of the table on the screen prior to the table, and on at least one of the early Kindle Fire devices the table itself may appear to get stuck, taking a dozen swipes to advance past the table. It will appear to work fine in the previewer, though (but the previewers don’t display tables accurately for how they will work on all possible devices).
As another example, the most recent Kindle devices and the previewers will show more special symbols than older devices actually support.
A FEW FORMATTING TIPS
Following are a few tips that help to format a Kindle eBook.
- Use paragraph styles in Word (or call style definitions in HTML) for all paragraph formatting. Do this religiously.
- Don’t apply direct formatting to an entire paragraph (or more). If you want formatting to apply to an entire paragraph, create a new style for that.
- A common mistake where direct formatting is applied is to highlight multiple paragraphs and change the settings, or to change the settings on the Paragraph or Font menu in Word and proceed to type one or more paragraphs.
- Don’t use the tab key in your eBook. Too late? Use the Replace tool to remove every instance of ^t.
- Avoid blank lines. Use Spacing After with an appropriate paragraph style in places where you need to add vertical space.
- Keep it simple. If you try to do something complex, it may backfire on one or more devices or apps. You’d hate for part of your book to be totally unreadable on an older device, or for an indent to be huge on a small screen, for example.
- Be careful not to introduce a worse problem by trying to fix a subtle design issue. Again, keeping it simple is a good Kindle philosophy.
- When the content of your book is 100% complete (proofreading too), save your Word file as a filtered webpage. If your book includes any pictures, right-click on the resulting HTML file and send it to a compressed zipped folder. Find the image files folder that this process makes and drag it into the compressed zipped folder.
- You can make some subtle improvements to your HTML file. For example, you can set text-indent to 0 instead of 0.01″ for non-indented paragraphs (but don’t remove the text-indent line or the paragraph may automatically indent). For indented paragraphs, you can change the text-indent to 2em or 3em so that it matches the font size. (Keep your indents small. Word’s default value of 0.5″ is larger than most traditionally published books and would look very large on small screens.)
- If you know what to look for, the HTML file can help you see formatting that is hidden in Word. (Are you thinking about the Show/Hide button? I’m talking about formatting that’s so hidden that even Word’s Show/Hide button doesn’t reveal it.)
THE STORY BEHIND MY NEW BOOK
My other self-publishing books primarily focus on how to self-publish a paperback book. Although they do mention eBook formatting, the eBook is only a small component of those books.
I wanted to create a guide specifically for Kindle formatting.
When I was thinking about the title, it occurred to me that the behavior of Kindle eBooks as perceived by a new author sometimes seems mysterious (“Why did that happen?”), so I came up with the title, Kindle Formatting Magic. I added two words to make it Word to Kindle Formatting Magic because most authors have access to and familiarity with Microsoft Word, and since Kindle formatting can be very Word friendly (once you learn how to control hidden formatting in Word).
I originally had a 100 to 200-page book in mind. A couple of years back, I hired illustrator Melissa Stevens (www.theillustratedauthor.net) to design the cover. Her design seemed really magical, and it motivated me to try to make the inside of the book as magical as the cover.
I completely reorganized and rewrote the material. I did this a couple of times. At one point, it was going to be two separate volumes. In the end, the paperback edition has 522 pages on 8.5″ x 11″ pages (it’s also available in Kindle format, of course).
A few months ago, I wrote that I had spent 1-2 years working on this book, but a few weeks ago I dug up my old files and discovered that I’ve been working on this book for nearly three years. Time flies!
I spent much time experimenting with Kindle formatting, trying out a feature, uploading the file to KDP, and testing it out. This was very time-consuming, but also enlightening. I took several snapshots and included these pictures in my book to help illustrate many of the issues faced with Kindle formatting.
Much has changed at KDP in the past couple of years. A lot of these changes occurred as I was writing my book, so I had to constantly rewrite sections that I had previously written. For example, the Kindle previewer has been updated to include Auto-Advance, there are new Kindle reading apps, there is a new X-Ray feature, KDP’s print option has expanded, the 127 KB rule for GIF images has been updated, and some of the KDP help pages have been extensively revised.
My book covers the following topics:
- The basics, like removing tabs, extra line breaks, extra spaces, page numbers, unsupported symbols, etc. One appendix lists every symbol that is fully supported across all devices (there are even notes about correct and incorrect ways to insert supported symbols). A handy checklist helps to ensure that you’ve implemented all of these steps.
- A detailed guide to using Word’s paragraph styles to format your eBook. There is even a step-by-step tutorial in an appendix at the back of the book to walk you through it with a specific example. I provide several specific recommended paragraph styles commonly used in eBook design. I show you how to create new styles, modify existing styles, deal with hidden styles (like TOC or Footnote), manage your styles (like Disable Linked Styles and what the confusing Automatically Update box really means), and use the Style Inspector to check for common problems.
- One chapter is devoted to picture size, aspect ratio, format, file size, image design considerations, captions, tables formatted as images, padding, transparency, and everything related to pictures.
- Multiple sections discuss a variety of Kindle design concepts, like the challenges of formatting bullet points, issues related to left and full alignment, how pictures affect design, the helpfulness but also the dangers of the non-breaking space, and much more.
- Another chapter shows you how to go a quick step beyond Word. I tried to make this as friendly as possible, even showing how you could be an HTML minimalist. You really don’t need to learn HTML, and that’s the beauty of it. You don’t actually have to write HTML. It’s already written. All you need to do is make small changes to a little of the HTML that’s already there, and I show you exactly which changes to make and how they should look with specific examples (I even have several complete recommended style definitions that you can copy). You can keep this simple and make just a few helpful changes, but for those who want I offer many other optional changes that you can make (for example, how to use media queries to format drop caps that work well across all devices). This chapter shows you how what you do in Word affects the HTML, which helps you learn how to control hidden formatting from Word. For those who want to work more with HTML, I show you the HTML that relates to Kindle formatting to help you better understand your HTML file, which can be helpful if you want to make extensive revisions (this is easily skipped by authors who want to avoid HTML as much as possible).
- Learn how to preview your Kindle eBook thoroughly using the online previewer, the more reliable downloadable previewer, and actual devices or apps. For example, you can preview your eBook on a PC, laptop, tablet, or cell phone using a free Kindle reading app. Detailed checklists help you with proofreading, editing, and a variety of specific features to look for and test in the way of formatting.
- A troubleshooting section includes several common Kindle formatting issues with possible solutions. Find detailed explanations whether you used Word exclusively or went beyond Word to use HTML (each issue offers solutions for both cases). This isn’t like a troubleshooting section that you find in the owner’s manual of an electronic device: I tried to make this readable and understandable for everybody.
- An appendix provides a short sample eBook. Labeled pictures show you which paragraphs have which styles in Microsoft Word, and I included the full HTML for the sample eBook so that you can see the style definitions and everything else.
- I spent much time testing out various features, and I included several pictures in my book to demonstrate a variety of formatting challenges.
- For those who would also like to publish a paperback version of their book, I walk you through the steps involved in converting your eBook to a print-ready PDF.
- Also find valuable tips relating to sales rank, keywords, categories, customer reviews, marketing, promotions, giveaways, and more. (Authors often tell me that the marketing advice that I include in my books on self-publishing is easily worth the price of the entire book. One section is dedicated to marketing and premarketing tips, but a few other sections also relate to marketing.)
YOU COULD WIN A FREE COPY OF MY BOOK
Enter my Amazon Giveaway (which expires at the end of March 24, 2018 in the US), which will have 50 lucky winners. That could be you, and the odds are favorable (as of now, there are about 70 entrants for 50 books, which gives you amazing odds). It’s a sweepstakes, so all 50 books will be given away, and you’ll find out if you win at the end of March 24.
https://www.amazon.com/ga/p/29e81d46a95ba752
I also have a Goodreads giveaway beginning soon with 100 lucky winners which will last for a couple of weeks.
The Goodreads giveaway doesn’t start until March 26 and ends on April 10, 2018. Once March 26 gets here, you can find the Goodreads giveaway at:
If you buy the paperback version directly from Amazon, after doing so, you will be eligible to purchase the Kindle edition free through MatchBook. You could give the print version as a gift and keep the Kindle edition for yourself, or you might find it handy to have the paperback spread out on your desk while you’re formatting your next book and also have another copy that you can access from your phone or tablet.
If you have a Kindle Unlimited subscription, you can also borrow my book for free. (Amazon Prime customers can also borrow one free book per month.)
Write happy, be happy. 🙂
Copyright © 2018
Chris McMullen